
If you want to clean an engine block for a head gasket replacement, you need to remove all old gasket material, oil, and debris from the block’s surface. Use a plastic scraper, engine degreaser, and lint-free cloths. Avoid scratching the metal.
The surface must be dry, smooth, and clean before installing a new head gasket.
Why Cleaning The Engine Block Matters For Head Gasket Replacement
For a successful head gasket replacement, the engine block’s surface must be spotless and flat. Any old gasket, oil, or dirt can cause the new gasket to leak, leading to engine overheating or damage. Cleaning ensures a tight seal and helps your engine run safely and efficiently.
If you skip this step or do it poorly, even a brand-new gasket may fail quickly.
Most head gasket failures are caused by overheating or improper installation. But about 25% of gasket jobs fail because the block or head was not cleaned well enough. Even tiny particles or leftover old gasket can stop the new gasket from sealing fully.
That’s why professional mechanics spend extra time cleaning and checking the surface before assembly.
10 Best Engine Oil 2026: Don’t Buy a Single Quart Until You See These
Tools And Supplies You’ll Need
To clean the engine block properly, gather these items before you start:
- Plastic or brass scraper (never steel)
- Engine degreaser or brake cleaner spray
- Lint-free rags or shop towels
- Small wire brush (brass preferred)
- Soft nylon brush
- Vacuum cleaner (for loose debris)
- Compressed air (if available)
- Razor blade (for stubborn material, use with care)
- Masking tape and plastic sheeting (to protect cylinders)
- Torque wrench (for reassembly)
- Safety gloves and goggles
Each tool has a specific purpose. For example, a plastic scraper won’t scratch the block’s aluminum surface, while a wire brush helps with heavy carbon deposits. Avoid sandpaper or abrasive pads, which can damage the sealing surface.
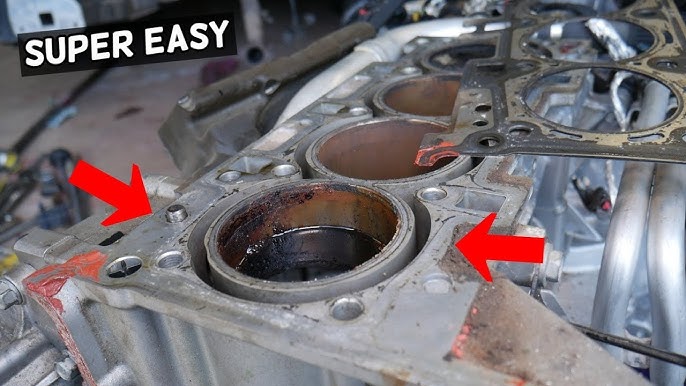
Credit: www.youtube.com
Step-by-step Guide: How To Clean Engine Block For Head Gasket
Cleaning the engine block is a detailed process. Here’s how to do it safely and effectively.
1. Prepare The Work Area
First, make sure the engine is completely cool. Park the car in a well-ventilated place. Disconnect the battery for safety. Lay down plastic sheeting and organize your tools nearby.
Cover the cylinders, oil passages, and coolant holes with clean rags or masking tape. This keeps dirt and debris out of sensitive areas, reducing the risk of engine problems later.
2. Remove Old Head Gasket Material
Carefully peel away any large pieces of the old head gasket from the block. Use a plastic scraper to lift stuck material. Work slowly to avoid gouging the metal. For stubborn spots, apply a little engine degreaser and let it soak for a few minutes.
Tip: Never use a steel scraper or power tools. Even minor scratches can prevent the gasket from sealing. For tight corners, a brass wire brush or a razor blade (used flat and gently) can help.
3. Clean Off Oil, Grease, And Carbon Deposits
Spray engine degreaser or brake cleaner directly onto the block’s surface. Let it work for a few minutes. Wipe with lint-free rags, changing rags as needed. Use a nylon or brass brush on any carbon build-up. Vacuum or blow away loose material with compressed air.
Repeat until the block feels smooth and completely clean to the touch. There should be no visible residue, oil, or gasket fibers left.
4. Protect Internal Parts
It’s easy for small pieces of debris to fall into the cylinders, oil galleries, or coolant passages during cleaning. Always keep these areas covered until you’re ready to assemble. If you suspect debris has fallen inside, vacuum it out or use compressed air to clear it.
5. Inspect The Block Surface
After cleaning, inspect the block carefully. Look for scratches, pitting, corrosion, or warping. The surface should be flat and shiny. If you see damage, use a straightedge and feeler gauge to check flatness. Most head gaskets require the surface to be within 0.
002–0. 004 inch flatness across the block.
If the block is out of spec, you may need professional resurfacing at a machine shop. Do not install a new head gasket on a damaged or warped block.
6. Dry And Final Clean
Wipe the block one last time with a clean, dry rag. Make sure the surface is totally dry—no oil, solvent, or water should be left. Remove any tape or rags from the cylinders and oil passages.
Your engine block is now ready for the new head gasket.
Common Mistakes To Avoid When Cleaning The Engine Block
Many beginners make errors that can cause leaks or engine damage later. Here are the most common mistakes, and how to avoid them:
- Using abrasive pads or sandpaper: These can create grooves or remove too much material. Always use soft tools.
- Leaving old gasket material behind: Even a small piece can cause a leak. Be thorough.
- Letting debris fall into cylinders or oil passages: Always cover and protect these areas.
- Not checking for warping or damage: Flatness is as important as cleanliness.
- Using too much solvent: Excess cleaner can run into engine passages and cause problems later. Use sparingly and wipe dry.
- Rushing the process: Cleaning takes time. Don’t cut corners.
Credit: www.reddit.com
Top 7 best head gaskets – Long-Lasting Seals for High-Performance Engines
Comparing Cleaning Methods For Engine Blocks
Different cleaning methods have pros and cons. Here is a comparison of the most common ways to clean an engine block surface before a head gasket replacement.
| Method | Effectiveness | Surface Safety | Best For |
|---|---|---|---|
| Plastic Scraper | Good | Very Safe | General use, aluminum blocks |
| Brass Wire Brush | Very Good | Safe if used gently | Stubborn deposits, steel blocks |
| Razor Blade | Excellent | Risky (if not careful) | Thin gaskets, corners |
| Chemical Gasket Remover | Good | Very Safe | Softening old material |
| Abrasive Pad (not recommended) | High | Unsafe (can damage surface) | Not advised for DIY |
As shown, plastic scrapers and brass wire brushes are safest for beginners. Razor blades work well but require steady hands and patience. Abrasive pads can cause more harm than good and are best left to professionals.
Engine Block Materials: Aluminum Vs. Iron
The type of engine block affects how you should clean it. Here’s a quick comparison:
| Block Material | Cleaning Cautions | Typical Tools |
|---|---|---|
| Aluminum | Soft, scratches easily | Plastic scraper, nylon brush |
| Cast Iron | Harder, more durable | Brass brush, plastic scraper |
With aluminum blocks, be extra gentle and never use steel tools. For cast iron, you can use a bit more force, but scratching is still a risk.
Real-world Example: Cleaning An Engine Block For Head Gasket On A Toyota Corolla
Let’s look at a practical example. Suppose you are replacing the head gasket on a 2005 Toyota Corolla. This car has an aluminum engine block.
First, you would disconnect the battery and drain the coolant. Next, remove the cylinder head following the repair manual. Clean the block as described above—using a plastic scraper and engine degreaser, and taking extra care not to scratch the soft aluminum.
After cleaning, inspect the surface for corrosion or pitting, which is common in older engines. If you find any, use a straightedge to check flatness. If the block is within spec, you can continue with the new gasket installation.
Professional mechanics often use special straightedges and machinist tools to confirm flatness. If you don’t have these tools, many auto parts stores will rent them.
Tips For A Perfectly Clean Engine Block
Achieving a spotless surface isn’t just about effort—it’s about technique. Here are some advanced tips that even many experienced DIYers overlook:
- Change rags often. Dirty rags only smear oil and debris around, making cleaning harder.
- Work in natural light if possible. It’s easier to spot leftover gasket material and imperfections.
- Feel the surface with your fingers. Sometimes, you’ll notice rough spots or grit that is hard to see.
- Use a final wipe with isopropyl alcohol. This removes any oily residue that could affect gasket sealing.
- Keep the area covered until you are ready to install the head gasket. Dust and debris can settle quickly.

Credit: www.reddit.com
What To Do If The Block Surface Is Damaged
If you discover scratches, pits, or warping on the block, do not ignore it. Here’s what you should do:
- Check flatness using a machinist’s straightedge and feeler gauge. If it is out of spec, the block needs to be machined.
- Light corrosion or pitting can sometimes be cleaned up with a fine brass brush or special chemical cleaners, but deep damage requires professional help.
- Never try to sand or grind the block surface by hand. This can make the problem worse.
- Consult a machine shop if you are unsure. They can resurface the block for a perfect seal.
Trying to install a new gasket on a bad surface is a waste of time and money. Most shops charge $50–$150 to resurface a block, which is much less than the cost of a second repair if the gasket fails.
How Long Does It Take To Clean An Engine Block For Head Gasket?
The cleaning part usually takes 1–2 hours for most DIYers. Professionals might do it faster, but they use special tools and have more experience. The whole head gasket job, including cleaning, can take 4–8 hours for a typical 4-cylinder engine.
Plan your time carefully. Rushing through cleaning is a common reason for gasket failure. If you need to stop partway, cover the block tightly to keep it clean.
Essential Safety Tips
Working with engine cleaners, solvents, and sharp tools can be risky. Always:
- Wear gloves and safety goggles to protect your hands and eyes.
- Work in a well-ventilated area to avoid breathing fumes.
- Dispose of old rags and cleaning chemicals properly.
- Wash your hands after handling any engine degreaser or solvent.
Some engine cleaning products can damage paint or plastic parts. Cover these areas before spraying chemicals.
Signs Of A Clean And Ready Engine Block
How do you know when the block is clean enough? Look for these signs:
- The surface is shiny, flat, and smooth
- No visible oil, old gasket, or dirt remains
- The block feels clean to the touch, with no sticky or rough areas
- All holes and passages are clear and free of debris
If in doubt, clean one more time. It’s better to be too clean than not clean enough.
What Happens If You Don’t Clean The Engine Block Properly?
Failing to clean the engine block correctly can cause:
- Immediate head gasket leaks after reassembly
- Engine overheating due to coolant loss
- Contamination of new oil and coolant
- Engine misfire or rough running
- Expensive repeat repairs
In severe cases, you might need to replace the head gasket again within weeks or months. Taking the time now saves a lot of trouble and cost later.
Advanced Cleaning Methods Used By Professionals
While most DIYers use scrapers and degreasers, professionals have access to advanced tools:
- Rotary gasket remover tools: These use special pads but require great care. Even pros sometimes avoid them on aluminum.
- Solvent tanks and hot tanks: For cleaning entire blocks during rebuilds.
- Ultrasonic cleaners: Used in high-end rebuild shops for deep cleaning.
- Surface finish testers: To measure roughness and ensure a perfect seal.
These methods are rarely needed for a simple head gasket job but show the level of detail possible in engine building.
Data: Head Gasket Failure Rates Due To Improper Cleaning
A study of engine repair shops in the US found that 23% of repeat head gasket failures were linked directly to poor block cleaning. Of these, most failures happened within 5,000 miles after repair. This shows how critical proper cleaning is for long-lasting results.
Where To Find More Information
Many car manufacturers publish specific instructions for cleaning and preparing engine blocks. Always check your vehicle’s repair manual for any special steps. For more detailed technical tips, visit sites like Engine Builder Magazine, which covers professional techniques and new developments.
Frequently Asked Questions
How Clean Does The Engine Block Need To Be For A Head Gasket?
The block must be completely free of old gasket, oil, and dirt. The surface should be shiny, smooth, and dry. Even tiny particles can cause the new gasket to leak.
Can I Use Sandpaper Or A Wire Wheel To Clean The Block?
No. Sandpaper and wire wheels can damage the surface and create grooves. Always use a plastic scraper or soft brush.
What Should I Do If I Scratch The Block Surface While Cleaning?
Small, shallow scratches may be okay, but deep scratches can cause leaks. If in doubt, check with a machine shop. They can resurface the block for a perfect finish.
Do I Need To Use A Chemical Gasket Remover?
Chemical gasket removers can help soften old material, making it easier to scrape off. They are not required, but often make cleaning faster and safer.
How Can I Protect The Cylinders And Oil Passages During Cleaning?
Cover all open areas with clean rags or masking tape before you start. Remove these just before installing the new head gasket to keep everything clean.
A careful, patient cleaning process is the foundation for a successful head gasket repair. Remember: the time you spend now will save you much more time and trouble in the future.